Written by Daniel
Edited on
12 July 2024
·
15:23
How do you install a Honeywell Lyric thermostat?
You've received your new Honeywell Lyric and want to install it. You'll be working with electricity, which can be stressful. In this article, we'll explain how to safely install the thermostat.
Get started with the Honeywell Lyric T6
Before you start the installation, you turn off the power to the heating. First, turn off the heating on the fuse box. Your boiler shouldn't start working when you increase the heat on your old thermostat. Next, you can remove the plug for the boiler from the socket.
- Step 1: mount the thermostat.
- Step 2: connect the wires of the thermostat.
- Step 3: connect the boiler module to the thermostat and the boiler.
- Step 4: start the setup on the thermostat.


Step 1: mount the thermostat
At the back of the thermostat, you'll find a mounting plate. You attach this plate to the wall in a place that doesn't get too hot. For example, in the place of your previous thermostat or near your boiler. Mount the boiler module between your thermostat and the boiler or district heating valve. You connect this module with a wire to the thermostat and the boiler in the next step.

Step 2: connect the wires of the thermostat
Connect the wire of the module to the thermostat. This cable goes into the connector with a T above it on both ends. The colors don't matter. You don't need the S connectors on the thermostat.
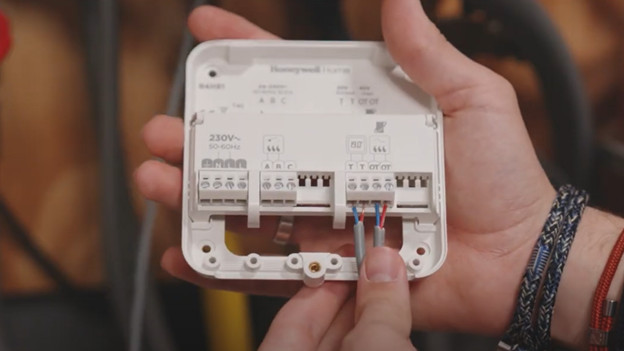
Step 3: connect the boiler module to the thermostat and the boiler
You can now connect the wires to the boiler module. You connect the on/off cable that goes to the boiler or district heating valve to the A and the B connectors. Once again, the color doesn't matter. For a boiler with OpenTherm, you use the OT connectors on the module instead of the AB connectors. All devices are now connected. Check if all of the cables are connected correctly. Now connect the boiler module to the power grid. The blue wire should go in the N port and the brown wire in the L port.

Step 4: start the setup on the thermotat
Close the hatch on the boiler module and click the thermostat onto the wall plate. After, you plug your boiler and boiler module into the socket. You can now follow the instructions on the thermostat to set it up. If you don't think you can install the thermostat after reading this article, our Customer Service is happy to help.