Written by Frank
Edited on
27 January 2025
·
13:10
How do you install the BlueBuilt Swivel Wall Mount 48-75 inches?
You want to mount your television close to the wall with the BlueBuilt Swivel Wall Mount 48 - 75 inches. On this page, you can read how to do this step by step.
Before you start
| Estimated installation time | 45 minutes |
|---|---|
| Recommended number of people | |
| Suitable surface | Solid brick or solid concrete |
| Prior to drilling | Check if there aren't any cables or pipes behind the wall with the wall scanner |

What do you need?
In the box
- Bag with screws and plugs for the wall
- Bag with screws
- Rings and spacers
- TV frame
- Wall mount
- Spacer
- Template
- Wrench, hex key
- Velcro for your cables
What do you have to get yourself?
- Cross-head screwdriver
- Wall scanner
- 5mm drill bit
- 12mm drill bit
- Pencil
- Tape measure
- Hammer
- Impact drill or concrete drill
- Cup of coffee
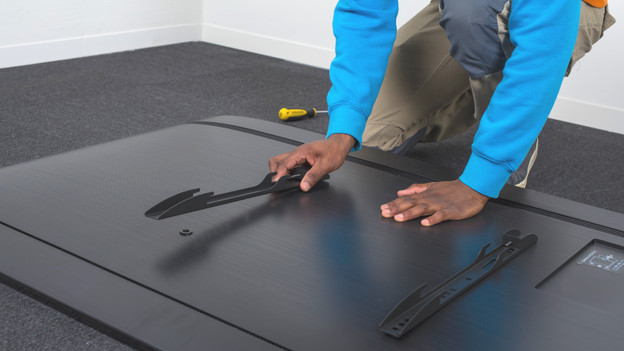
Step 1: place the frames
Place your TV on a rug and place the TV frames (4) on your TV as shown on the photo.
Check which screw from the M-A to M-H bags (2) is suitable for your TV. You only need 1 set.
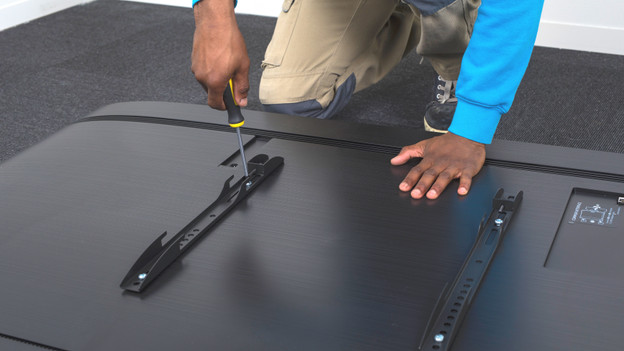
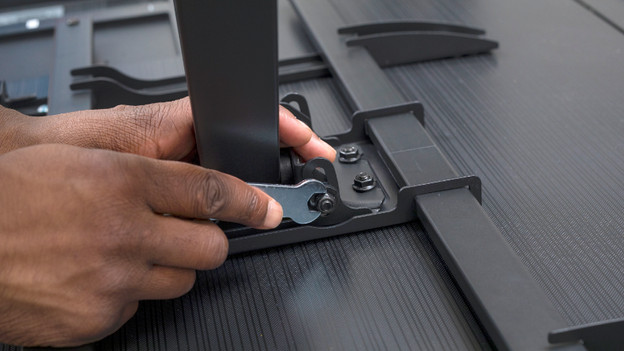
Step 2: mount the frames
Attach the frame to the TV with screws. Do you have extra space? Put a ring (M-I) (3) or spacer (M-J or M-K) (3) between the screw and frame.
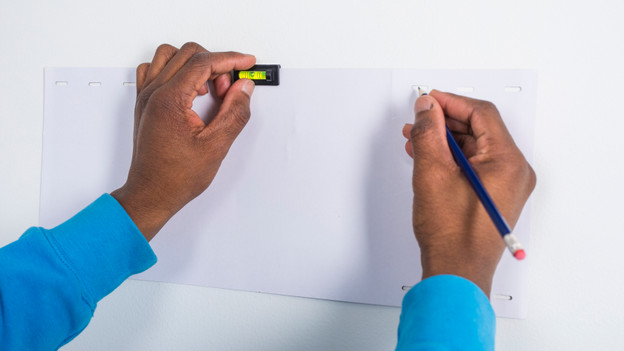
Step 3: mark
Draw an X on the wall where the center of your TV should be.
Place the template (7) on the wall and draw 4 drill holes with the spirit level (M-L) (3).

Step 4: drill
If you use the 5mm drill bit first and then the 12mm drill bit, you can drill more precisely. Drill as deep as the length of the screws (W-A) (1). Hammer the plugs (W-B) (1) into the holes.

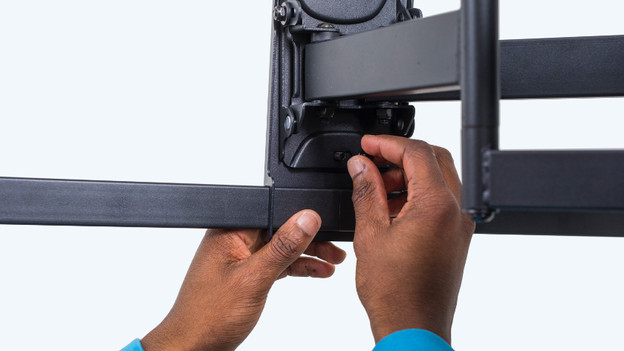
Step 5: mount the connection part
Slide the 2 separate parts (6) into the spacer. Use the small screws and tighten them with the hex key.
Step 6: mount the wall mount
Mount the wall mount to the wall level with the rings (W-C) (3) between the wall mount and screws. Attach the spacer level to the wall mount with screws.

Step 7: mount the television
Lift the TV with someone and attach it to the spacer.
Tighten the screws on the bottom of the mount so you can secure the TV properly.
Step 8: tilt the mount
Tilt the mount to the desired position and fix it in place with the wrench.
Done! Give yourself a pat on the back, turn on the TV, and take a seat on the couch.
Article by Frank
Television Expert.