Written by Frank
Edited on
27 January 2025
·
13:10
How do I install the BlueBuilt adjustable universal projector mount?
You want to mount your projector to the ceiling with the BlueBuilt adjustable universal projector mount. On this page, you can read how to do this step by step.
Before you start
| Estimated installation time | 30 minutes |
|---|---|
| Recommended number of people | |
| Suitable ceilings | Solid concrete, don't install the mount on drywall |
| Prior to drilling | Use the wall scanner to check if there aren’t any pipes or cables in the ceiling |

What do you need?
In the box
- Clamps
- Ceiling plate
- Cover
- Bar
- Screws and plugs
- Bolts without washers
- Bolts with raised washers
- Bolts with flat washers
- Intermediate piece
** Tools**
- Drill
- Drill bit
- Pencil
- Hex key
- Screwdriver
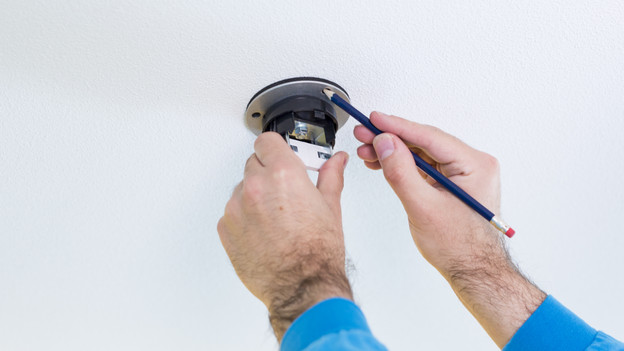
Step 1: mark the drill holes
Mark the drill holes using the ceiling plate (2). This way, you can be sure you're drilling in the right spot.
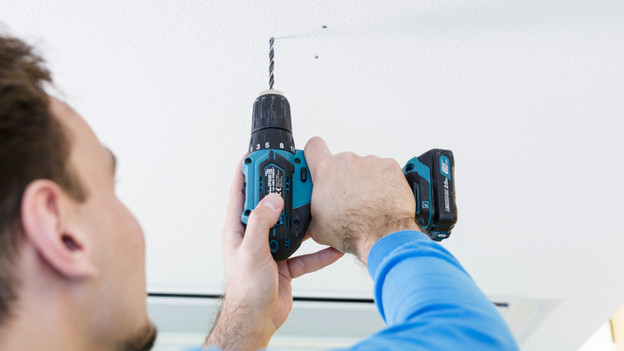
Step 2: mount the ceiling plate
Drill holes up to 5cm deep and screw the ceiling plate (2) on tight with the long screws and plugs (5).

Step 3: place the cover and bar
Place the cover (3) on the ceiling plate (2), and mount the bar to the hanging ceiling plate (2). You do this with the bolts (6) and the hex key (13).
Note: the ceiling plate isn't hanging in the picture, but it should for your purposes. Also make sure you have the bolts.
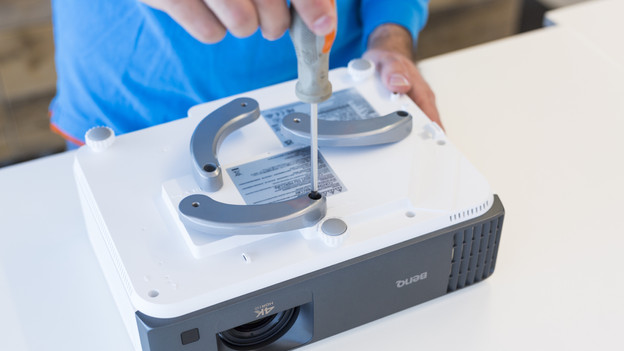
Step 4: screw in clamps
Screw in the clamps (1) almost completely with the screwdriver. Use the bolts with raised washers (7) for this. To check if the drill holes were placed right, use the intermediate piece (9). If this is the case, you can tighten the clamps to the projector.

Step 5: tighten intermediate piece
Use the hex key (13) and bolts with flat washers (8) to attach the intermediate piece (9) to the clamps (1). Make sure the drill hole on the top of the intermediate piece is pointing straight to the front.

Step 6: mount the projector
Mount the projector to the hanging bar (4) and tighten the last bolts (6) with the hex key (13).
And you're done!
Article by Frank
Television Expert.